

Understanding Sliding Shower Door Bottom Guides
Sliding shower door bottom guides, often secured with a screw, are crucial components ensuring smooth operation and preventing misalignment of framed shower doors.
These guides, like the Gordon Glass Acrylic guide, provide essential support for the glass panel during sliding motion.
Various styles, including plastic and metal options, are available for replacement, addressing issues like sticking or breakage.
What is a Sliding Shower Door Bottom Guide?
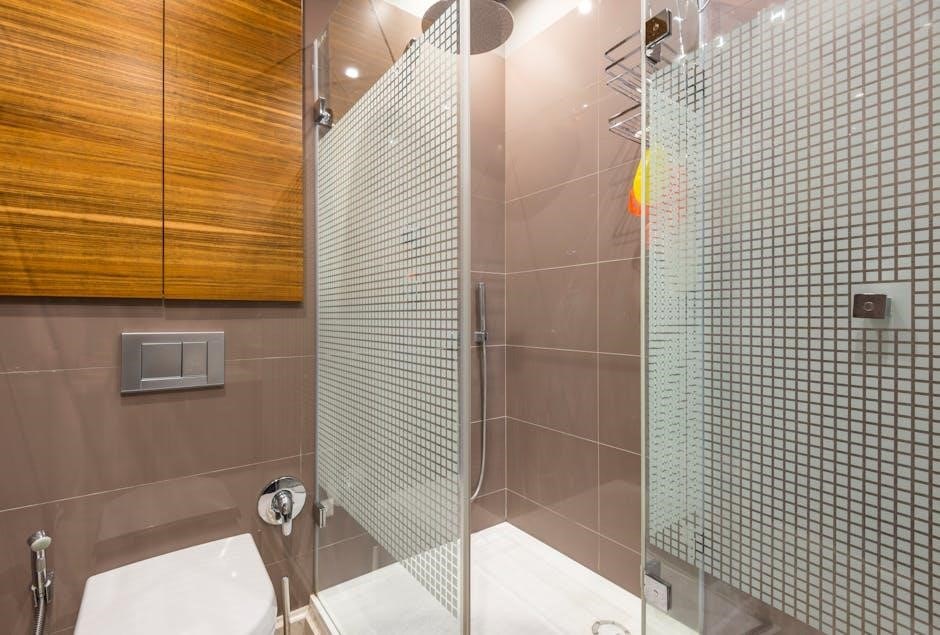
Sliding shower door bottom guides are essential components found along the lower edge of a shower enclosure, specifically designed to keep the door securely in its track. Often, these guides, like the Gordon Glass Acrylic guide, are affixed using a screw for a stable and reliable hold.
They are typically constructed from durable materials like plastic or metal, providing a smooth surface for the door to glide along. These guides prevent the door from lifting off the track during operation and maintain proper alignment, preventing leaks.
A common example is a 1-1/2 inch wide plastic track guide (PART BH-192) used for framed shower doors, demonstrating their role in supporting the weight and ensuring effortless sliding.
The Function of the Bottom Guide
The primary function of a sliding shower door bottom guide, often secured with a screw, is to provide stability and directional control to the shower door during its sliding motion. It prevents the door from derailing or lifting off the track, ensuring a watertight seal and smooth operation.
These guides bear a significant portion of the door’s weight, reducing stress on the upper tracks and hinges. By maintaining consistent contact with the track, they counteract any imbalances and prevent binding, addressing issues where the door requires excessive force to open.
Properly functioning guides, like those found in sliding-by-pass enclosures, eliminate grinding and ensure the door glides effortlessly, saving you from straining your back when opening or closing.
Common Problems with Bottom Guides
Sliding shower door bottom guides, secured with a screw, frequently experience sticking, cracking, or loosening. These issues hinder smooth operation and require prompt replacement.
Sticking or Difficult Sliding
Sliding shower doors experiencing resistance often point to issues with the bottom guide, particularly where the screw fixings have loosened or the guide itself is worn. A common complaint, as noted online, involves needing significant force to move the door – sometimes requiring a foot against the frame!
This friction can stem from debris accumulation within the track, but frequently, a misaligned or damaged bottom guide is the culprit. Inspect the screw connections; loose screws contribute to instability. Consider that plastic guides can wear down over time, creating increased friction. Addressing this promptly prevents further damage and restores effortless sliding action.
Regular cleaning and tightening of screws are preventative measures.
Cracked or Broken Guides
Cracked or broken sliding shower door bottom guides necessitate immediate attention, as they compromise the door’s stability and can lead to potential hazards. Online resources highlight the importance of prompt replacement when encountering such damage. Often, the screw fixings, while intact, are supporting a compromised guide, unable to bear the door’s weight effectively.
Plastic guides are particularly susceptible to cracking, especially with age or stress. A broken guide will undoubtedly cause difficult sliding and potential misalignment. Ensure the new guide, secured with the appropriate screw type, matches the original style for proper functionality. Ignoring this issue can lead to glass breakage or complete door failure.
Safety first – address broken guides swiftly!
Missing Screws or Loose Mounting
Missing screws or a loose mounting of the sliding shower door bottom guide are common issues impacting door operation. A secure attachment, utilizing the correct screw type, is vital for stability. Online advice emphasizes regularly checking screw tightness as part of preventative maintenance. A wobbly or detached guide prevents smooth sliding and can cause the door to misalign or even fall off its track.
Even if the guide itself isn’t broken, loose mounting compromises its function. Carefully inspect the screw holes for damage; stripped holes may require wall anchors or larger screws. Re-tightening or replacing screws is a simple fix, restoring proper support and preventing further issues.
Don’t ignore loose hardware!

Tools and Materials Needed for Replacement
Essential tools include an appropriate screwdriver for the screws securing the sliding shower door bottom guide, plus cleaning supplies and a matching replacement guide.
Screwdriver (Appropriate Type)
Selecting the correct screwdriver is paramount for successfully removing and installing a sliding shower door bottom guide secured with screws. Often, these guides utilize Phillips head screws, necessitating a Phillips head screwdriver. However, some older models might employ flathead screws, requiring a flathead screwdriver instead.
A magnetic-tipped screwdriver is highly recommended, as it aids in retrieving and positioning screws within the often-confined space of the shower enclosure. Ensure the screwdriver bit precisely matches the screw head to prevent stripping, which can complicate the replacement process. Having multiple sizes available is also a good practice, guaranteeing you have the right tool for the job.
A power screwdriver can expedite the process, but use caution to avoid over-tightening and damaging the guide or surrounding surfaces.
New Bottom Guide (Matching Style)
Procuring a new bottom guide that precisely matches the existing style is critical for a seamless replacement. Consider whether your current guide is plastic, metal, or adjustable, and purchase a replacement of the same type. Many options, like the 1-1/2” wide plastic track guide, are readily available online or at hardware stores.
Pay close attention to the mounting style – specifically, if it utilizes screws. Ensure the new guide includes compatible screws or that you have appropriately sized screws on hand. A correct fit guarantees proper alignment and smooth sliding action of your shower door.
Incorrectly sized or styled guides can lead to further issues and necessitate additional repairs.
Cleaning Supplies
Gathering appropriate cleaning supplies is essential before tackling the bottom guide replacement. You’ll need a general-purpose cleaner to remove soap scum and grime from the track and surrounding area. A degreaser can be particularly helpful for stubborn buildup that might impede the shower door’s sliding action.
A soft cloth or sponge is vital for gentle cleaning, preventing scratches on the glass or the guide itself. A small brush, like an old toothbrush, can reach tight spaces around the screws and within the track.
Finally, have a dry cloth available to wipe away any remaining moisture after cleaning, ensuring a secure surface for the new guide.
Step-by-Step Replacement Guide
Replacing a bottom guide involves inspection, shower door removal, unscrewing the old guide, and installing a new one, securing it with a screw.
Step 1: Inspect the Existing Bottom Guide
Begin by carefully examining the existing sliding shower door bottom guide. Look for visible signs of damage, such as cracks, breaks, or significant wear and tear. Pay close attention to the area where the guide is secured with a screw; check if the screw is loose, stripped, or corroded.
Assess how easily the shower door slides – any sticking or difficulty indicates a potential problem with the guide or its mounting. Note the guide’s material (plastic or metal) and its overall style, as you’ll need a matching replacement. A thorough inspection will help determine if a simple tightening of the screw is sufficient or if a full replacement is necessary for smooth operation.
Step 2: Removing the Shower Door
Carefully remove the shower door to access the bottom guide. This usually involves lifting the door upwards and outwards, disengaging it from the top track and the bottom guide. It’s highly recommended to have an assistant for this step, as shower doors can be heavy and awkward to handle.
Support the door throughout the lifting process to prevent it from falling and causing damage. Once clear of the tracks, gently lay the door on a protected surface – a blanket or cardboard – to avoid scratches. Removing the door provides unobstructed access to the screw securing the bottom guide, facilitating its removal and subsequent replacement.
Step 3: Removing the Old Bottom Guide
With the shower door removed, focus on detaching the old bottom guide. Locate the screw(s) securing the guide to the shower base. Using an appropriate screwdriver, carefully unscrew and remove them, storing them safely for potential reuse if in good condition.
Once the screws are out, gently pry the old guide loose. If it’s stuck, avoid excessive force; a little wiggling or the use of a plastic putty knife can help. Inspect the area for any remaining sealant or debris, cleaning it thoroughly to prepare a smooth surface for the new guide’s installation.

Step 4: Preparing the Surface
Thorough surface preparation is vital for a secure and lasting installation. After removing the old bottom guide and its screw(s), meticulously clean the area. Remove any lingering adhesive residue, old sealant, or grime using appropriate cleaning supplies – a scraper and solvent may be necessary.
Ensure the surface is completely dry before proceeding. Inspect for any damage to the shower base; minor imperfections can be addressed with a suitable filler. A clean, smooth, and dry surface guarantees optimal adhesion for the new guide, preventing future issues like loosening or misalignment.

Installing the New Bottom Guide
Securely position the new sliding shower door bottom guide, aligning it with the original screw holes. Then, firmly tighten the screws for stability.
Ensure proper alignment before fully tightening to guarantee smooth door operation.
Step 5: Positioning the New Guide
Carefully align the new sliding shower door bottom guide with the existing mounting points on the shower base or threshold. Ensure the guide is oriented correctly, matching the direction of the old one, and that any grooves or channels are properly aligned with the door’s edge.
Before fully committing, double-check that the guide sits flush against the surface. If screw holes don’t perfectly align, slight adjustments might be needed. Gently press the guide into place, ensuring it’s stable and won’t shift during screw installation. Remember, proper positioning is vital for smooth sliding action and preventing future issues.
Confirm the guide’s placement before proceeding to secure it with screws.
Step 6: Securing the Guide with Screws
Using the appropriate screwdriver, carefully insert screws into the pre-drilled holes of the new sliding shower door bottom guide. Avoid over-tightening, as this could crack the guide, especially if it’s plastic. Tighten the screws gradually and evenly, ensuring the guide remains firmly in place against the shower base.
If the original screws are stripped or damaged, consider using new ones of the same size and type. Double-check that the screw heads are flush with the guide’s surface to prevent snagging. A secure attachment is crucial for the guide’s functionality and the door’s stability.
Test the screw tightness gently after installation.
Types of Bottom Guides Available
Sliding shower door bottom guides come in plastic, metal, and adjustable varieties, often secured with a screw for stability and easy replacement.
Acrylic guides, like those from Gordon Glass, are also common.
Plastic Bottom Guides
Plastic bottom guides represent a cost-effective and widely available solution for sliding shower doors, frequently installed and secured using a screw. These guides, often white as seen in various models, are designed for framed shower doors and offer a self-adhesive or screw-in mounting option.
They are particularly suitable for lighter glass panels and provide sufficient support for typical residential use. While generally durable, plastic guides may be more prone to wear and tear compared to metal alternatives, potentially requiring more frequent replacement.
However, their ease of installation and affordability make them a popular choice for DIY repairs. Many options, like the 3-long x 1-3/8 wide shower door guide, are readily available online.
Metal Bottom Guides
Metal bottom guides offer enhanced durability and support for sliding shower doors, often installed and secured with a robust screw mechanism. These guides are particularly well-suited for heavier glass panels or doors experiencing frequent use, providing long-lasting performance and resistance to wear.
While typically more expensive than plastic alternatives, metal guides minimize the need for frequent replacement, offering a cost-effective solution in the long run. They are less susceptible to cracking or breaking under stress, ensuring continued smooth operation.
Choosing a metal guide ensures a secure and stable sliding action, addressing issues like sticking or difficult movement effectively.
Adjustable Bottom Guides
Adjustable bottom guides provide a versatile solution for sliding shower doors, often incorporating a screw-based mechanism for fine-tuning the door’s alignment. This adjustability is invaluable when doors begin to bind or drag, allowing for precise correction without complete replacement.
These guides compensate for slight variations in wall alignment or settling, ensuring a smooth and effortless sliding motion. They are particularly useful during initial installation or after home renovations.
The screw adjustment allows homeowners to easily level the door, preventing water leakage and maintaining a secure seal. Regular checks and adjustments can extend the life of the entire shower enclosure.
Preventative Maintenance
Regularly inspect the sliding shower door bottom guide and its screw mounting for tightness. Cleaning prevents grime buildup, ensuring smooth gliding and extending its lifespan.
Regular Cleaning
Sliding shower door bottom guides, particularly those secured with a screw, are susceptible to soap scum and mineral deposits. Consistent cleaning is paramount for maintaining optimal functionality. Utilize a mild detergent and warm water, applying with a soft cloth or sponge to avoid scratching the guide’s surface.
Pay close attention to the track where the guide operates, removing any debris that could impede smooth sliding. A toothbrush can be effective for reaching tight spaces. After cleaning, thoroughly rinse with clean water and dry completely to prevent water spots and further buildup. This simple routine significantly extends the guide’s lifespan and prevents sticking.
Remember, a clean guide contributes to a smoother, quieter shower experience.
Checking Screw Tightness
For sliding shower door bottom guides affixed with a screw, regular inspection of screw tightness is vital. Over time, vibrations from door operation and general wear can cause screws to loosen, leading to guide misalignment and difficulty sliding. Employ an appropriately sized screwdriver to gently tighten any loose screws, avoiding over-tightening which could strip the screw holes or damage the guide itself.

This preventative measure ensures the guide remains securely in place, providing consistent support for the shower door. Addressing loose screws promptly prevents more significant issues, such as cracked guides or complete guide failure, saving on costly repairs or replacements.
Make this a routine part of your shower maintenance.