
A drywall sander is a powerful tool designed for smoothing drywall surfaces efficiently. It features an articulating head‚ adjustable speed‚ and dust collection systems for optimal performance. This manual guides users through safe operation‚ assembly‚ and maintenance to achieve professional results.
Overview of Drywall Sanders and Their Purpose
Drywall sanders are specialized power tools designed to smooth and finish drywall surfaces efficiently. They typically feature an articulating sanding head‚ adjustable speed settings‚ and a dust collection system to minimize mess. These tools are essential for achieving professional-grade results on walls and ceilings‚ ensuring a smooth surface for painting or finishing. Drywall sanders are available in both manual and electric versions‚ with electric models offering faster operation and reduced physical effort. Their primary purpose is to remove joint compound‚ sand rough spots‚ and blend edges seamlessly. By using a drywall sander‚ users can save time and effort compared to manual sanding‚ while achieving a high-quality finish. Proper use of these tools requires adherence to safety guidelines and maintenance practices outlined in the manual.
Importance of Using a Drywall Sander Manual
A drywall sander manual is crucial for ensuring safe and effective operation of the tool. It provides detailed instructions for assembly‚ maintenance‚ and troubleshooting‚ helping users avoid common mistakes. The manual outlines safety precautions to prevent accidents and offers guidance for achieving optimal sanding results. By following the manual‚ users can extend the lifespan of their sander‚ maintain performance‚ and ensure compliance with manufacturer recommendations. It also serves as a reference for understanding the tool’s features and proper usage techniques. Adhering to the manual’s instructions helps users avoid potential hazards and ensures they achieve professional-quality finishes on drywall surfaces. Regularly consulting the manual guarantees that the sander operates efficiently and safely‚ making it an indispensable resource for both novice and experienced users.
Safety Precautions and Warnings
Always wear protective gear‚ including safety glasses and a dust mask. Avoid loose clothing and keep long hair tied back. Never operate the sander near water or in humid environments. Ensure proper ventilation to prevent dust inhalation. Keep children and pets away during operation. Regularly inspect the tool for damage and follow all safety guidelines outlined in the manual to prevent accidents and ensure safe usage.
General Safety Guidelines for Operating a Drywall Sander
Before using a drywall sander‚ ensure the work area is clear of debris and flammable materials. Always wear safety glasses‚ a dust mask‚ and keep loose clothing tied back. Avoid operating the sander in confined or poorly ventilated spaces‚ as dust buildup can pose health risks. Ensure the tool is assembled correctly following the manual’s instructions. Keep the sander away from water or moisture to prevent electrical hazards. Never sand surfaces containing asbestos without proper protective equipment. Regularly inspect the sander for damage‚ such as worn belts or loose parts‚ and replace them as needed. Maintain firm control of the sander during operation to avoid loss of balance. Follow all safety warnings provided in the manual to minimize risks and ensure safe‚ effective use of the tool.
Emergency Procedures and First Aid
In case of an emergency‚ immediately turn off the drywall sander and unplug it to prevent further risk. For electrical shock‚ disconnect the power source and seek medical help. If a body part is caught in the sander‚ switch it off and carefully free the area without causing further injury. For minor cuts or abrasions‚ apply direct pressure with a clean cloth and seek medical attention if necessary. Inhaling dust or debris requires moving to fresh air and seeking medical help if breathing difficulties persist. Keep a first aid kit nearby and ensure someone trained in first aid is present. Always follow the manual’s emergency guidelines to ensure safety and proper response to accidents.

Assembly and Initial Setup
Begin by unpacking and inventorying all parts‚ including the sander‚ extension tubes‚ and dust extraction hose. Follow the manual’s step-by-step guide to assemble the tool‚ ensuring all components are securely attached. Attach the dust bag or connect the hose for proper dust collection. Double-check for any damage or missing parts before use. Ensure the sanding head is aligned and the handle is tightened firmly for safe operation. Refer to the diagram in the manual for clarity and confirm all safety features are functional. Proper assembly is crucial for optimal performance and safety.
Unpacking and Inventory of Parts
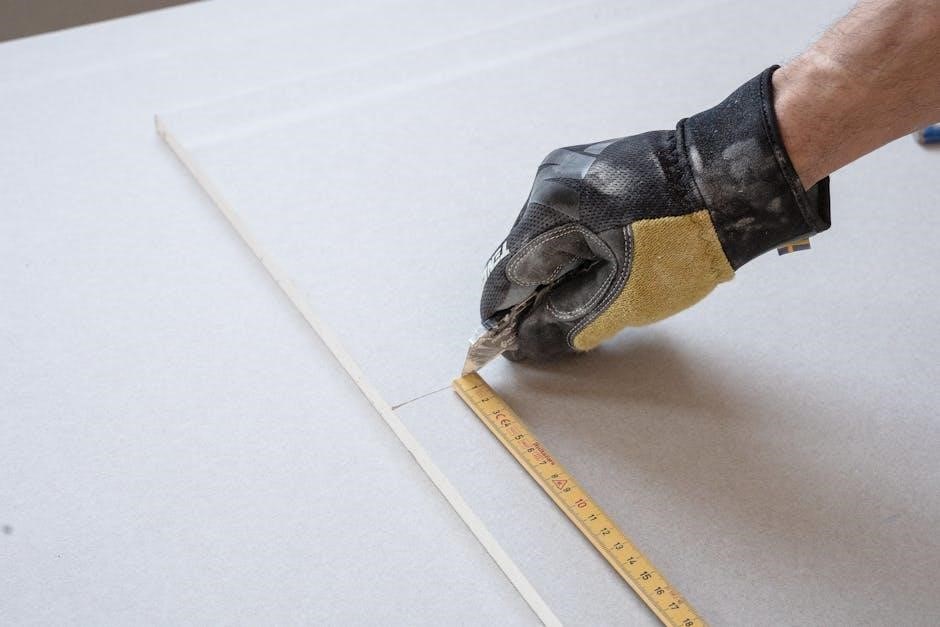
Begin by carefully unpacking the drywall sander and all included accessories from the box. Ensure no components are damaged during shipping. Cross-reference the parts list in the manual with the items received‚ such as the sander unit‚ extension tubes‚ flexible dust extraction hose‚ sanding discs‚ and carrying bag. Inspect each part for visible damage or defects. Check for any missing items‚ as all components are essential for proper assembly and operation. Pay special attention to the sanding head‚ handle‚ and dust collection system. If any parts are damaged or missing‚ contact the manufacturer immediately to avoid delays. This step ensures you have everything needed to assemble and operate the sander safely and effectively. Proper inventory is crucial for a smooth setup process and optimal performance.
Step-by-Step Assembly Instructions
Begin by attaching the extension tubes to the main sander unit‚ ensuring they are securely locked in place. Next‚ connect the flexible dust extraction hose to the sander’s dust port and the other end to a vacuum system or dust collection bag. Attach the sanding head to the sander’s articulating arm‚ aligning the screws properly. Tighten all connections firmly to prevent loose parts during operation. Install the handle by aligning it with the mounting bracket and securing it with the provided screws. Finally‚ attach the sanding disc to the backing pad using the hook-and-loop system. Ensure all parts are tightly fitted and double-check the assembly against the manual’s diagrams. Proper assembly is critical for safe and efficient operation. Once assembled‚ test the sander at a low speed to ensure smooth movement and functionality.
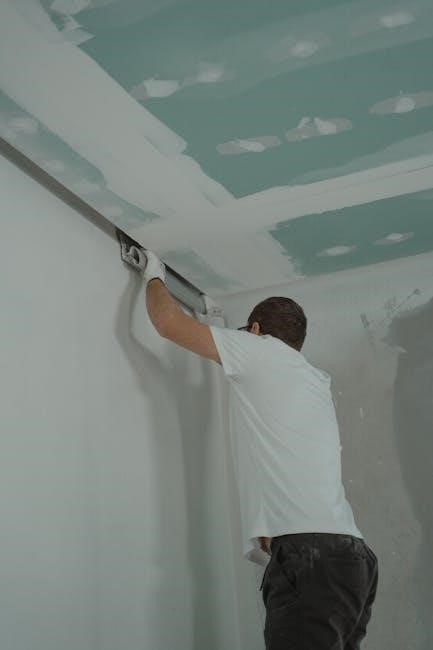
Operating the Drywall Sander
Start with a low speed setting to maintain control‚ gradually increasing as needed. Keep the sander flat and use smooth‚ even strokes for consistent results. Utilize the adjustable handle for better maneuverability and leverage the articulating head to cover large areas efficiently. Always ensure proper dust extraction is in use to minimize mess and improve visibility. Regularly check the sanding disc for wear and replace it when necessary. Maintain steady pressure to avoid uneven surfaces and take breaks if the sander overheats. Follow the manual’s guidelines for optimal performance and safety.
Basic Operating Instructions for Smooth Sanding
Begin by ensuring the work area is clear of debris and obstructions. Assemble the sander according to the manual‚ attaching the appropriate grit sandpaper. Plug in the sander and adjust the speed setting to a low or medium range for initial use. Hold the sander firmly with both hands‚ maintaining a slight downward pressure but avoiding excessive force. Move the sander in smooth‚ overlapping strokes‚ working in a consistent pattern to cover the entire surface. Use the articulating head to navigate corners and edges seamlessly. Keep the dust extraction system active to minimize dust dispersion. Regularly inspect the sanding disc for wear and replace it as needed. Avoid applying uneven pressure‚ which can create scratches or uneven surfaces. For optimal results‚ sand in small sections‚ working methodically across the wall or ceiling. After completing‚ turn off the sander and allow it to cool before storing. Always follow the manual’s guidelines for proper technique and safety.
Advanced Sanding Techniques for Optimal Results
For advanced sanding‚ start by using a coarse-grit sandpaper (e.g.‚ 80-120 grit) to remove imperfections like joint compound ridges or nail pops. Progress to finer grits (150-240) for a smoother finish. Utilize the sander’s articulating head to navigate corners and edges seamlessly‚ ensuring even coverage. Apply consistent‚ light to moderate pressure‚ avoiding excessive force that could damage the drywall. Sand in overlapping circular or figure-eight patterns to prevent streaks. Focus on one section at a time‚ working methodically across the surface. Use the dust extraction system to maintain visibility and reduce cleanup. For ceilings‚ sand in sections‚ moving from one end to the other to ensure uniformity. Avoid sanding over the same spot repeatedly‚ as this can create unevenness. Finally‚ inspect the surface under bright lighting to identify and address any remaining imperfections before finishing.
Maintenance and Troubleshooting
Regularly clean the dust extraction system and replace worn sanding pads. Lubricate moving parts and inspect for wear. Address issues like overheating by checking for blockages or damaged components.
Regular Maintenance Tips for Longevity

Regular maintenance is crucial to extend the life of your drywall sander. Start by cleaning the dust extraction system after each use to ensure optimal suction and prevent clogging. Inspect and replace worn sanding pads or discs promptly to maintain sanding efficiency. Lubricate all moving parts periodically to reduce friction and wear. Check the power cord and connections for damage‚ and ensure all bolts and screws are tightened securely. Store the sander in a dry‚ clean environment to protect it from moisture and dust. Refer to the manual for specific maintenance schedules and guidelines. Following these tips will help maintain your drywall sander’s performance and longevity‚ ensuring it continues to deliver smooth‚ professional results for years to come.
Common Issues and Solutions
Common issues with drywall sanders include dust extraction system clogs‚ uneven sanding‚ and worn-out sanding pads. For clogs‚ clean the dust hose and ensure proper vacuum connection. Uneven sanding can be resolved by adjusting the sanding head alignment or replacing worn pads. If the sander vibrates excessively‚ check for loose bolts or imbalance in the sanding disk. To address reduced suction‚ inspect and clean the dust collection system thoroughly. For motor overheating‚ allow the tool to cool down and ensure proper ventilation. Regularly inspect and replace sanding discs to maintain performance. Always refer to the manual for troubleshooting specific to your model‚ as neglecting these issues can lead to reduced efficiency or tool damage.
Mastering your drywall sander involves following safety guidelines‚ maintaining equipment‚ and using proper techniques. By adhering to this manual‚ you’ll achieve professional finishes efficiently and safely every time.

Final Tips for Effective Drywall Sanding
- Always use the correct grit sandpaper for your project to ensure a smooth finish.
- Maintain consistent pressure to avoid uneven sanding and potential damage to the drywall.
- Use the dust collection feature to minimize mess and reduce cleanup time.
- Adjust the sander’s speed according to the surface type for optimal results.
- Work in small‚ manageable sections to maintain control and precision.
- Clean the sanding pad regularly to prevent dust buildup and clogging.
- Keep the workspace well-ventilated to avoid inhaling dust particles.
- Store the sander and accessories properly after use to ensure longevity.
- Practice on scrap material before sanding large areas to refine your technique.
By following these tips‚ you’ll achieve professional-quality results and extend the life of your drywall sander.